 |
||||||||
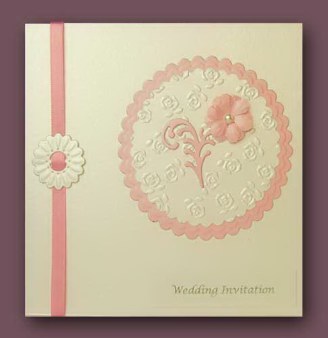
Card Making Project - Flower and Ribbon Wedding Invitation
Made by Madeleine
This pretty wedding invitation used Stardream Quartz and Stardream Rose but the colours can be easily changed to suit the bride's colour scheme. The Stardream Quartz buckle is made using the Spellbinder's Shapeabilities Ribbon Buckles set.
You will need a die cutting machine for this project.
|
||||||||
 |
To make this card you will need:
|
|||||||
Cut the A4 Stardream Quartz to 148 x 297mm and then score down the middle to create a 148 x 148mm square creased card.
Run the small ribbon buckle flower die with Stardream Quartz card, the larger scallop circle with Stardream Rose card, the larger scallop circle with Stardream Quartz card and the larger swirl Motif from the Marianne Creatables LR0116 set through the die cutting machine to cut the shapes. Change plates and run the ribbon buckle and larger scallop circle through again to emboss.
Place the smaller scallop circle in the roses embossing folder and run through the die cutting machine.
Place 2 3D foam pads on the ribbon buckle die cut. Thread the ribbon through the buckle and then glue the buckle down on the card with the centre of the buckle approx. 20mm from the left hand side of the card. Fasten the ribbon at the back of the card using double sided tape.
Using photo glue, attach the Stardream Rose scallop circle to the card and then glue the embossed scallop Stardream Quartz circle centrally on top.
Punch and emboss 2 flowers using the Nellie's medium flower punch and glue them together using a mini glue dot.
Using photo glue position and glue down the die cut motif then, using a mini glue dot, attach the flower. Add a 5mm self adhesive pearl to the centre of the flower.
Cut out the wedding invitation wording and glue to the bottom right of the card using photo glue.
********************************
Please feel free to copy this card for your own use. Our angel policy can be accessed via the Gallery home page.
___________________________________________________________________________
|
||||||||
|
||||||||