 |
||||||||
Card Making Project - Vintage Car Christmas Easel Card
Made by Mary
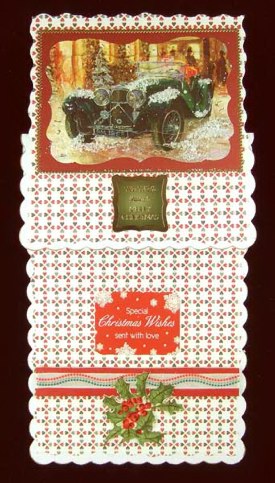
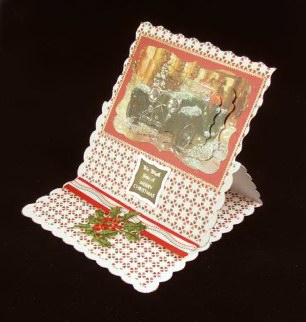
Mary has made an easel card that she has decorated both inside and out using left over pieces from previous Christmas card projects. The picture on the left shows the inside of the easel card. The picture on the right shows the easel card as it would be displayed by the recipient.
|
||||||||
 |
 |
|||||||
To make this card you will need:
|
||||||||
Making the base for the easel card
Ink the edges of the scallop card with the gold ink pad both at the front and back of the card.
Score down the centre of the front of the scallop card.
The inside of the card
Take a sheet of the patterned paper from the Home for Christmas paper pad. Using decorative scissors cut the paper to 142mm x 142mm leaving one edge straight. Using double sided tape or photo glue adhere the paper to the inside of the card with the straight edge against the crease.
Cut a piece of Stardream Jupiter card to measure 20mm x 140mm. Cut a length of the red and green on white ribbon slightly longer than the Jupiter card. Attach the ribbon to the Jupiter card with double sided tape taking the ends around the back of the card. Attach the Jupiter card to the inside of the card approx. 48mm from the bottom edge of the card.
Push out the Special Christmas wishes sentiment from the Sparkling Sentiments topers and glue it
just above the Jupiter card using photo glue or double sided tape.
Push out the holly sprig from the Christmas post toppers and using foam tape attached it under the Stardream Jupiter card so that the upper holly leaves overlap the Jupiter card.
Creating to topper for the outside of the card
Take another sheet of the patterned paper from the Home for Christmas paper pad. Using decorative scissors cut the paper around each edge to give a finished size of 148mm x 148mm.
Cut a piece of smooth bright white card to 75mm x 115mm and, using photo glue or double sided tape, attach it to the top of the patterned paper at the back. This will give the paper the strength it need when it stands up as an easel.
Cut a piece of Stardream Mars card to measure 132mm x 92mm. Glue to the upper half of the patterned paper using photo glue or double sided tape. Attach fine border peel offs around the edge of the Stardream Mars Card.
Push out the pieces from the A Vintage Journey card toppers and build up the decoupage using 3D foam pads. Using a glue pen and crystal glitter highlight the car and some of the ground to represent snow. Attach the decoupage to the centre of the Stardream Mars card using photo glue.
Push out the We Wish You a Merry Christmas sentiment from the Christmas by Candlelight toppers and glue to the bottom of the patterned paper using photo glue.
Using double sided tape or photo glue attach the topper to the front of the card gluing it just below the crease.
********************************
Please feel free to copy this card for your own use. Our angel policy can be accessed via the Gallery home page.
___________________________________________________________________________
|
||||||||
|
||||||||