 |
||||||||
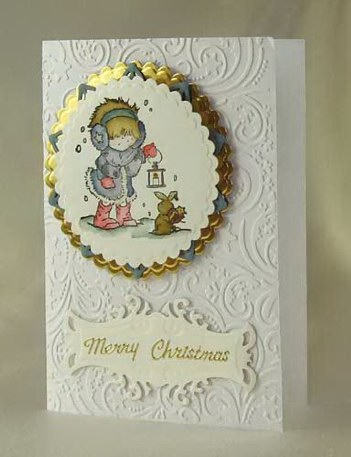
Card Making Project - Girl with Lantern Christmas Card
Made by Jacqui
A beautiful embossed and stamped card from Jacqui coloured with the Tim Holtz Distress Markers.
You need a die cutting machine to make this card.
|
||||||||
 |
To make this card you will need:
|
|||||||
Cut the A4 white smooth card to 178mm x 254mm and score down the middle to make a creased card 178mm x 127mm. Run the card blank through your die cutting machine using the design A on the M-Bossabilities folder on the front of the card only.
Using Stazon stamp the image onto a piece of quality white card leaving enough room to be able to die cut the image out. Now the tricky part: using the distress markers colour the image in, layering as you go, and using the water colour brush to move the ink around. Blues, grey and Milled Lavender were blended to get the shade of the coat and ear muffs, all the browns were used to get the hair shade correct, spun sugar and picket fence were blended to get the skin tone. Aged mahogany and Barn Door were used for the boots and mittens. It all looks much more scary then it is - it really just takes a bit of practice - just play till you get the colours you want.
Using the scalloped circles cut out the stamped image and then, changing plates, emboss the card. Cut the gold mirror card using the larger scallop circle, the Stardream Vista card with the Persian motif, and the Eider Vellum card with the fancy tags two. If you are using the Grand Calibur or the Big Shot with the extended plates you should be able to cut the dies all in one pass and then emboss in another pass once you've changed the plates.
Using silicon glue, attach the blue motif to the centre of the gold mirror card circle Attach the image to the centre of those layers. Add the peel off greeting to the fancy tag and attach this to the base card.
Tip: for this project silicon glue is much better than foam pads as it not only adds dimension but settles into the delves and bumps left by the embossing to give a better finish to your card.
********************************
Please feel free to copy this card for your own use. Our angel policy can be accessed via the Gallery home page.
______________________________________________________________________________
|
||||||||
|
||||||||