 |
||||||||
Card Making Project - Gilded Stamped Christmas Tree
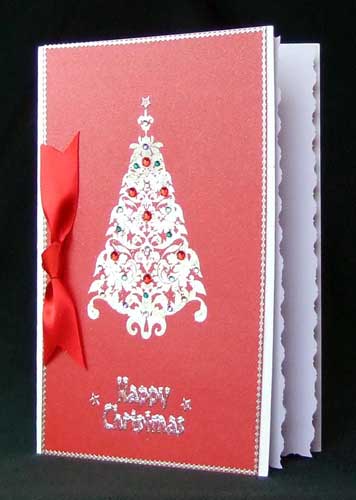
Made by Mary
This Christmas card is made using the Christmas Tree clear stamp and Silver Moon gilding flakes. If you haven't used gilding flakes before you might want to read the Craftsite blog article on How to Use Gilding Flakes
|
||||||||
 |
To make this card you will need:
|
|||||||
Using a scoring board score the A4 White Hammer card to make an A5 creased card. Cut the Stardream Jupiter card to measure 210mm x 138mm.
Using the essential glue pad and the Christmas tree stamp, stamp the image in the upper centre of the Stardream Jupiter card leaving enough space to add the sentiment later. Spread the Silver Moon gilding flakes over the stamped image and brush off the excess using the big dome stencil brush and return the excess flakes to your container.
Tip: to preserve the life of your stamp clean it immediately with warm soapy water and pat off the excess with kitchen towel. Leave the stamp to air dry.
Attach the Stardream Jupiter card to the white hammer creased card using double sided tape leaving 5mm white border at each side. Place silver narrow border peel offs around all 4 edges of the Stardream Jupiter card.
Add the Happy Christmas silver glitter peel off to the bottom of the card and two peel off stars from the same sheet. Place another peel off star at the top of the tree.
Decorate your tree with the self adhesive gems. Mary used seven of the red gems from the 4mm Festive gems pack and a mixture of green, blue, gold, lilac and clear gems from the two 3mm packs.
Cut the length of red ribbon into a "v" shape at the top and bottom and make a knot in the centre. Attach the ribbon to the left hand side of the card using mini glue dots.
Add an insert to your card using decorative scissors or the rotary trimmer and colonial blade to give it a fancy edge.
Once you've made this card try different combinations of gilding flakes, gems, and colours of card - the effect you will get will be different on each one.
********************************
Please feel free to copy this card for your own use. Our angel policy can be accessed via the Gallery home page.
___________________________________________________________________________
|
||||||||
|
||||||||